Well, It’s Been Awhile

I am fully moved into my new studio. It took some doing but I’ve been here now for over a year.

The move was exhausting, it’s amazing how much stuff I accumulated in the 30+ years I was at the Fortress. Luckily the distance I had to haul that stuff was only a little more than a couple of miles.

In the process of moving I also had quite a lot of work to get out including several more of my guitar stools. I also designed and made a new dining table base for a client that had a glass table top and I continued the work of converting a clients beds from queen size to king and double to queen. Oh, and I completed another surfboard table that was shipped out to L.A.

As part of this change in studio I have created a space for making art. particularly 2D art, paintings and prints. I’ll be posting some my recent paintings soon.

A small table from scrap pieces

small table by Todd Fillingham, all rights reserved

I had intended to post part II of the Three Rivers series before posting about anything else, but it has been some time since I’ve posted about furniture and I’ve just finished this new piece so I thought I’d sneak this post in now.

We needed a table of just the right height to hold a fan in our bedroom window at home.  Although I am in the midst of a pretty big project just now I thought I’d check out a few of my scrap piles to see if there was anything there to inspire me.

Dsc00893

Dsc00894

And, while I was at it, maybe I’d check out the paint locker and see what was lurking in there.

Dsc00895

Here’s what caught my eye:

A couple of pieces of MDF, some interesting walnut cut-offs and a nice green latex paint.

A couple of pieces of MDF, some interesting walnut cut-offs and a nice green latex paint.

I glued up the MDF pieces into a block 1-1/2″ thick-

Dsc00897

Cut the walnut cut-offs to a uniform length-

Dsc00898

Then drew a pleasing curve to shape the legs.

Dsc00899

I cut out the first leg, used it as a pattern to trace out the other two, cut them on the bandsaw and sanded the curved cut.

Dsc00900

Dsc00901

Dsc00903

Next I created a guide for my router to cut out the mortises into the top that would hold the legs.

Dsc00904

The legs were rounded over on the router table on the long straight face.

Dsc00905

I used a variety of implements to draw out a pattern for the top, created a template for 1/2 of the top, transferred that shape onto the top, flipping over the template to get the other half so that the curves would be symmetrical and shaped the top.

Dsc00907

Dsc00908

Dsc00909

I wanted to create an interesting joint detail where the legs met the top. I did some sketching and decided that the top should have its bottom edge rounded. This was done on the big shaper, a finger chewing machine if there ever was one.

Dsc00910

I managed to get the top rounded with out loosing any fingers and proceeded to cut the mortises on the under side of the top using the jig I had created earlier.

Dsc00912

I adjusted the fit of the legs into the mortises by carefully sanding down their final thickness.

Dsc00914

You can start to see what this table will look like at this stage. I still need to square off the round corners left by the router bit in the mortises. I did this by hand using a sharp chisel.

Dsc00918

Now I was able to see if the joint detail came out like I had hoped.

Dsc00921

OK, this was what I wanted. A look as if the legs were cradling the top. This is reminiscent to me of the original tripod that held a bowl or tray from eons ago.

And here’s the table before finishing:

Dsc00923

I painted the top, glued in the legs, rubbed on some of my special oil/ varnish mix and the table was complete.

Dsc00933sml2

add to del.icio.us :: Add to Blinkslist :: add to furl :: Digg it :: add to ma.gnolia :: Stumble It! :: add to simpy :: seed the vine :: :: :: TailRank :: post to facebook

The next table. part 4

The delivery date nears and I still want to apply a few more coats of finish so it looks like, once again, I won’t be able to take the time to properly photograph a piece before it leaves the shop.

I have been building up the polyurethane finish to a point which I can then sand it flat.

pedestal_tbl_fn2

pedestal_tbl_fn3

At this point the table is ready for the final coats.

pedestal_tbl_fn5

Although these shots don’t really show it there is a subtle wood grain showing through.

Here’s the table with two more coats to go.

pedestal_tbl_fn4sml

Part 3 is here.

add to del.icio.us :: Add to Blinkslist :: add to furl :: Digg it :: add to ma.gnolia :: Stumble It! :: add to simpy :: seed the vine :: :: :: TailRank :: post to facebook

The next table. part 2

So, the “machine” turned this:
dsc00657

into this:

dsc00673

And this is the lower part of the table. A top will be added to this. Then I will apply the veneers. In this case I am using maple veneers on a paper backing.

pedestal_tbl-dtl2a

Each piece of veneer is  trimmed to prepare for the next piece  on the adjacent face.pedestal_tbl-trim1

I am using a very sharp, rather flat carving gouge to trim the veneer. One wrong move and… well it’s not worth thinking about at this stage.

I don’t use a vacuum bag to clamp  these veneers, primarily because I don’t have the set up. Instead I use just about every trick in the clamping book.

pedestal_tbl_vnr

I am using weights, clamps (shop made and store bought) and long spring sticks that go up to the ceiling. I have a product known as kerf-board ontop of the veneer to help spread the clamping pressure. The most important thing is the glue I use. It is made for applying this particular kind of veneer, that is,  paper backed veneer. It is a water based contact cement that you set by applying hand pressure with something known as a veneer hammer. The glue needs to be “dry stacked”,  that is,  have some pressure applied,  for 24 hours after you use the veneer hammer, so that is what all of this in the above picture is about.

Just before writing this I just finished applying the final piece of veneer, the top piece, and will post the final finishing steps soon.

part 3 part 1

add to del.icio.us :: Add to Blinkslist :: add to furl :: Digg it :: add to ma.gnolia :: Stumble It! :: add to simpy :: seed the vine :: :: :: TailRank :: post to facebook


Oh what a long time it’s been…

…since I’ve last posted.

I have been working on such a number of interesting projects. There’s one, really interesting one that has been mostly in the planning stages.  I’ll have to wait just a little longer before I can post about it. But, I’ve been busy in shop as well.

I’ve been working on a couple of tables for a long time client. Both of these are headed for my client’s Florida home. The first one is a very large coffee table. It measures 88″ by 55″. But the wild thing about it is that it is not flat. The top is wavy.

Todd cutting the table to size.

Todd cutting the table to size.

Here I am cutting of the end of the glued up butternut planks. The table was too big to run through my table saw and a sharp handsaw works just as well.

The planks had a natural curve to them so during glue up I took as much advantage of this as possible.

Carving the surface with disc grinder.

Carving the surface with disc grinder.

Here you can see some of the waviness. The table was so large and heavy that I had to plan my work to minimize how often I turned the piece over. I carved out the bottom face first then flipped it using a block and tackle.

wavytbl_lift

I used a number of tools to shape the top.  Here are a few, ready at hand.

wavytbl_tools

The final sanding was very tedious, but since this table was to be varnished with a gloss spar varnish it was very important. I spent a lot of time carefully sanding the top.

Careful sanding was a must.

Careful sanding was a must.

The table is wrapped in blankets now and I haven’t taken any pictures of the final finish. I’ll try and get to that before the trucking company shows up.

Update: I found s few more images.

One of the base units being fit to the table top.

One of the base units being fit to the table top.

This and the next picture is of the table upside down as the two boxes that act as the base for the table are being fit to the wavy underside of the table top.

The 2 base boxes being fit.

The 2 base boxes being fit.

The next project was another table with curves, for the same clients. That’ll be in the next post.

Update 2: I pulled back the blankets and took a picture of the finished table top.

wavy_tbl_fin

Triadic

I walked into my studio this morning and was struck by the colors that seem to have infiltrated it.

Whoaa what happened here? I’m really not a big fan of these pastels, much less this triadic scheme. But there they were.

The boat was something I bought a year ago. I bought it because I have some questions about that particular design. It’s called a Car Topper. It was designed by the innovative and somewhat eccentric boat design Phil Bolger. “Dynamite” Harold Payson has written about building them and sells the plans. This boat was built by the father of a friend of mine. I had been thinking of building it myself but the price was right for this one so I bought it. It needs restoring and I have yet to get around to that.

Anyway, my friend’s father painted that boat those colors. I suppose he may have been thinking of tropical pastels or something. Something  like the way houses are painted through out the Caribbean. I don’t know. The odd thing is that my friend is an artist, a pretty well known artist who has many public art commissions in his portfolio and is known for his use of colors in his sculptures.

The surfboard is in for repairs. It’s a Robert August design and was shaped for the surfer I eventually bought it off of. Same color scheme as the boat! What is it about those colors?

Take a look at a color wheel. It’s set up based on the three primary colors arranged equidistant around a circle. That’s 120 degrees apart, which is what is meant by triadic colors, they are 120 degrees apart on the color wheel. Using triads creates a high energy kind of buzz of a color scheme. Adding white tones that down somewhat and shifts the scheme towards a pastel look but it still cries out for attention to me. Hey mahn, look ‘a me mahn, I’m over he-ah. Or something.

I’ve been thinking a long time about getting into boat building professionally. I’ve built a few boats in the past for fun or as the need arose, but now I’m looking to build boats for others. It’s a very daunting prospect. I realized a while ago that I needed to learn a lot more about boats and boat building before attempting this. I’ll be posting more on all this in coming posts. One of the reasons I bought the Car Topper was to do some initial tests on the water and to get my hands on a boat about that size. I’ve moved into a very different direction since buying it and am going to build a very traditional design, lapstrake boat but I still plan to restore this boat and use it for odd jobs around the water.

The surfboard is being repaired where an earlier repair, done before I got the board, failed a few days ago. I was out on some pretty decent sized waves, the first waves of any size for a long time around here. It’s been a very flat summer. About an hour and a half into the session, as I was paddling out and ducking into an oncoming wave as it broke over me I had my hand on the rail and could feel it flex and as it did I felt a crack open up. Not good.

I took the board into the studio a couple of days later (luckily I have another board that I used or the clean up session the next day, which BTW was awesome!) and inspected the damage. An old plug of pink builder’s foam had worked loose and created the crack. I had to grind down quite a lot of the rail, fill with epoxy and micro balloons and have just layered in some fiber glass cloth and resin. It should be ready in a couple of days.

I’m still working through a lot of material on boat building but hope to be starting a boat in a week or so.  The surf season is starting here so I’ll be quite busy for some time. I’ve got a new coffee table design I’ll be showing here as soon as I get it rendered the way I want and I’ve been commissioned to build another coffee table to be shipped down to Florida. Did I say I was going to be busy?

the approach

For the last 3 weeks I’ve been connecting with a group of teenagers as they learn about water, boats and the making of boats. The Milwaukee Community Sailing Center asked me to help in a summer program along with a group called Teen Approach. I was to provide what was needed to have the young people build and then ride in a boat. I had done a similar workshop last year.

I was to work with the teens and volunteers and a staff member from the Teen Approach program in the afternoons for 7 days. During the mornings instructors from Milwaukee Community Sailing Center (MCSC) taught the kids how to sail out on Lake Michigan.

I considered several designs and chose to stay with the design of the boats we built last year, a design called the “6 Hour Canoe”. An optimistic name that provides that sometimes critical ingredient needed in any challenging venture.

I prepared several pieces the week before the class so that the project could flow smoothly and be accomplished within the short time frame. We initially started with 6 students, various scheduling conflicts winnowed the core group to 4 by the time the boat was launched.

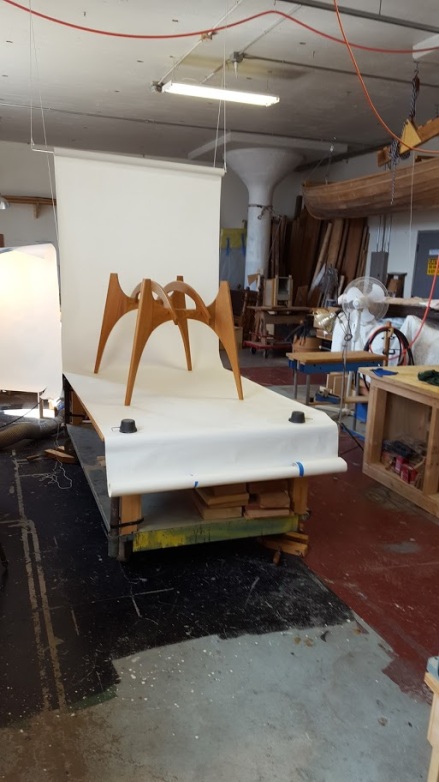
MCSC provided a shop space for us to work and this was how far we got by the end of the 3rd day.

The gunwales as well as the chine logs were clamped into place with dry wall screws as the epoxy thickened with cotton fibers that forms the adhesive we used through-out sets up. This meant a lot of screws were driven in and a lot of screws were removed. “Not the screws again!”

Soon the boat builders were fitting the bottom onto the upturned hull.

Once the outline had been traced the cutting could begin.

At this point we were down to 5 builders and they each took a turn using the jig saw while the others held the work piece in place, offered advice or took some time to absorb what it was they were doing.

The boat has nice lines. The boat builders sealed any exposed end grain with epoxy resin and filled any gaps and all screw holes with an epoxy filler. Lots of sanding brought the boat to a smooth enough surface for painting.

Sanding was one of the steps that the builders seemed to enjoy the most. Bending in and gluing the gunwales was an early step, a dramatic step and a somewhat tense step. They seemed relieved once the process became predictable. They also started taking ownership of the project, realizing that they were close to accomplishing quite a feat.

Soon the major, local media showed up…

…and the builders found an eloquence that was very refreshing, but not really surprising as they were being interviewed.

More paint!

As one coat dried I took a poll to see how many of them thought their boat would float. Four out of five maintained the optimism we started with. The fifth relished his outsider position for a short while before joining in to form a consensus.

There was some mixed opinions however when I asked them why it would float. Gravity was considered, the fact that wood floats was a popular view point, but there was a certain amount of doubt about the answer. Another break in the action as the paint dried allowed an opportunity to fill a large bucket with water and get down to some serious experimentation. We were able to discover the concept of displacement by using a shop made measuring device (a scrap of wood and a pencil) and we were able to witness a small plastic tub float until filled with water. The plastic tub, quickly known as a boat, was able to carry quite a number of stones without sinking but displacing ever more water, until of course the large rock appeared. It’s always good to check for the limits.

The force of the displaced water on our plastic boat could easily be felt and soon issues regarding the difference of weight and mass were being bandied about until another consensus was agreed upon about the weight of the water displaced and the weight of any vessel. OK, we could feel safe that the boat would float based on more than a democratic vote over the matter.

Now, the really important part needed to be resolved. Two parts actually, the boat’s name and it’s decoration.

The name was decided to be “Teen Approach”, the name of the summer program they attended, but also there was some mention of their own approach. Purple waves were added by some drawing an outline in pencil, another darkening the outline with a marker, a painter wielding a big brush and another with a small.

Screw eyes were added to attach light line that would hold in inflatable racing buoys that worked well for the additional flotation required by those who happened to have been sitting behind some desk indoors while the colloquium on displacement was being held. Tomorrow would be the launch.

The crew had dwindled to four by that time.

But…

…these seasoned shipwrights had brought along a contingent from the rest of the Teen Approach program to witness the launch and provide some labor for hauling the boat to the water.

The good ship was brought to the water.

And launched!

“Believe me, my young friend, there is nothing -absolutely nothing- half so much worth doing as simply messing about in boats. Simply messing…”

-Kenneth Grahame

add to del.icio.us :: Add to Blinkslist :: add to furl :: Digg it :: add to ma.gnolia :: Stumble It! :: add to simpy :: seed the vine :: :: :: TailRank :: post to facebook

…and winter winters on

at-house.jpg

This is four days after the last storm I posted about. This is what’s in front of our house. We’ve had several inches since then with more expected today.

Meanwhile I’m completing the the art nouveau style mirror frame. The last ribbon of wood, fret as I call it, is just about finished.

dsc00391.jpg

This is how it lies into the back of the mirror frame.

dsc00387.jpg

Two other frets, completed and ready to be glued in with the fret patterns.

dsc00385.jpg

As I was milling the tenons on my router set up as an end mill, for some reason the site of this graceful arc of wood clamped to this machine inspired me to take out my camera and shoot today’s shop series.

dsc00386.jpg

The tenons, or end tabs, are initially milled by this end mill.

dsc00390.jpg

I have to finish the joint by hand though. This is because the face being trimmed will have to mate against the inside curved surface of the mirror frame.

dsc00392.jpg

After I have the joints completed I shape the cross section into a gentle, flowing curve. I start by carving bevels that are eventually refined into the final curved section.

dsc00396a.jpg

dsc00397.jpg

This flowing bevel or chamfer reminds me of the path a down hill skier might take or even a surfer flowing across the face of a wave. It’s been a very long time since I did any down hill skiing and from the looks of the snow and ice it will be a while before I do any surfing. Winter!

Winter Storm

dsc00382a.jpg

It developed into near white out conditions this afternoon as we were hit with a major winter storm. The storm was projected to hit us over night with 10 inches of snow on the ground by sunrise. The low slowed and by morning we had only 4 or 5 inches. The worst was yet to come.

dsc00383.jpg

I decided to do my best to get into my studio today.

dsc00384.jpg

Here is my preferred mode of transportation on days like this. It only took about half an hour to ski in and I only had to take the skis off once to cross a major intersection. The rest of the way was kick and glide, kick and glide.

dsc00379a.jpg

By the time to storm got really bad I had classical music on in the shop and was chopping out mortises on an art nouveau style mirror frame I’ve been commissioned to make.

dsc00381.jpg

Some of my favorite hand tools are my set of Sandvik chisels and the maple mallet I made many years ago.

dsc00378.jpg

The mirror frame was designed by a client, a design firm, for a client of theirs out in California. They sent me a hand drawn design that I turned into a CAD drawing on Rhino. From that drawing I was able to print out enough data to create full size templates. I use lead ingots that I’ve fashioned into lofting ducks that can be used to hold a thin wood spline to pick up a curve from plotted points.

As the afternoon wore on I started getting phone calls about how bad the weather was getting, a friend asking why I was still at work, my wife saying she had made it home, so I decided to close up early, strap on my skis and head out.

The wind had picked up to 25 mph with gusts over 35 and the snow was still coming down hard. I picked a path that climbed the high ground above the river early on so that I could ski down hill for most of the way to the bridge I had to cross. I skied across a wide field in a park and tracked across the face of a large hill. It was quite disorienting as the snow in my face and the snow on the hill in front of me blended into a uniform visual field of all white. Eventually I came upon some hearty down hill skiers taking runs down the hill and climbing back up.

A little further on some folks saw me skiing and brought out a camera and asked me to stop for a picture, many people shouted encouragement, one woman wanted me to ski by tomorrow to give her ride to work on my skis! I love the way big storms bring out the best attitudes in people.

It took a good hour to make it home. The wind really slowed me down, but there were some great sections along the way that were pretty easy gliding.

Holly and I shoveled out our sidewalks. Tomorrow it will be back to shoveling as the snow is still coming down hard. It looks like we’ll end up with a good 20 inches out of this storm. For now I’m about to settle in and enjoy the rest of the evening inside.

Steel, Stone and Wood

Go to the bench stone, use your two hands and achieve the fundamental knowledge, experience and wisdom in your heart and mind. -Toshio Odate

steel-stone.jpg

The sharpening area in my studio.

Sharpening high carbon steel is basic to working wood.

Years ago I use to take all of my saw blades, jointer and planer knives and shaper cutters to a man who ran a small sharpening shop just west of downtown. Besides sharpening tools he also sold machinery, power tools, planer and jointer knives and saw blades. He had been connected with woodworking for many years and knew a lot about the trade, the tools, the people and the shops in Milwaukee. I wish I could remember his name. We always called him the guy out on State Street. His shop was actually a block north of State Street, but there wasn’t much else out that way back then so you could always find him if you drove just west of 12th Street on State.

There was a time when most large companies had woodworking shops as part of their organization. I was in one once, as it’s tools were being sold off, that had been on the top floor of a very large department store in the heart of downtown.

When I bought my table saw at an auction the guy on State Street knew that very saw. He asked me if there was still a stain on it from the time such and such had cut a couple of fingers off. The stain is still there, a reminder of the relationship between consequences and inattention.

I bought my shaper from the State Street guy. I discussed it with him for some time working out what I needed and what I could afford. He then ordered it from the manufacturer, set it up in his shop to make sure it worked, made a few adjustments, took it apart again and then delivered it and set it up again in my shop. He showed me a few of the more obscure aspects of that machine even throwing in an extra spindle at no charge. He was generous, but it was also good business. He knew that I was likely to buy more shaper cutters from him if I had two different size spindles.

He sharpened my blades and knives for me but I sharpened my own chisels. Wood chisels have to be kept very sharp at all times or they can be a dangerous tool. If the blade doesn’t do what you are intending it will likely slip. A slip with even a dull blade can cut through skin, tendons and muscle.

There is much said about how to sharpen tools. Just about any discussion among folks who rely on tools tends to get very esoteric about every detail in sharpening. Some folks swear that certain oils used to lubricate the sharpening stone are critical to a “truly sharp edge”. Others insist on particular stones mined from a particular region in Arkansas are absolutely essential to obtaining the “truly sharp edge”. Angles of bevels and micro bevels are studied and discussed. Some sharpening stones are best lubricated with oil, some with water. Water stones need special treatments.

I would walk into the State Street guy’s shop and bring up some of these cabalistic axioms, maybe hoping for some sage advice to set me on the path to the “truly sharp edge”. He took pity on me at some point eventually taking me back into the shop where his one employee was finishing up a set of jointer knives for me.

I don’t know what the guy on State Street would’ve thought of Toshio Odate’s words about sharpening. He died of prostate cancer some years ago. His wife tried to keep the shop open for a while, but what that shop offered was him and he was gone. The many wood shops around the city were gone as well. The neighborhood had gotten rough. One day I found a sign on the shop that it had closed.

What I did learn from the guy on State Street was that there really is no one path to the “truly sharp edge”. He showed me that he used water to lubricate an “oil stone”. That the grit of the stone was what he paid attention to, not where the stone had been mined or manufactured. He showed me that it was how you held your body, when you stroked the blade over the stone, that held the blade at the right angle. In a way he showed me that it was my steel, my stone and my wood that counted.

My set up works for me. I can stand comfortably holding the blade to the stone. I can lean as one with the blade, my hand, my arm, my back moving across a stone that I’ve had for at least 20 years. Water is at hand for lubrication.

I get my knives and blades sharp enough to easily shave a few of my hairs off the back of my wrists. That’s sharp enough. I know how sharp they are so I know how they will work the wood. I feel the cutting and know when to sharpen again. It takes time when I use my two hands. A very deep, very long time.

Surf Board Table III -v

cross-pcs.jpg

I’ve attached the cross pieces onto the base structure and after a little final sanding it is ready to be dyed black.

dye-black.jpg

I use a water based aniline dye. It will take two applications with some light sanding in between to give a nice even color. The water based dye will not fade when exposed to uv light as will alcohol based dye. Water based dye does raise the grain a little, hence the extra sanding step.

While the base dries I work on sanding the edges of the top.

edge-sand.jpg

It’s important to not overlook any detail at this stage. Soon I’ll be applying the finish and any touch-ups or adjustments will be very hard to do after that.

glossy-edge.jpg

The edges are staring to look nice and wood grain is starting to show it’s beauty. The top needs a final sanding and I will be ready to apply the finish.

scraping.jpg

As I work through ever finer grades of sandpaper, to bring out the true beauty of the wood, various small scratches begin to appear. They were always there, but were so fine that they weren’t visible until the wood around them is sanded with a very fine grit. The scraper takes very fine shavings off these areas, which will then be further sanded so that the top has a uniform, very fine, surface.

smooth-top.jpg

Next

Surf Board Table III -iv

glue-up.jpg

The table base is glued up. While the glue sets I’ll start sanding the boards I’ve glued up for the top. First I set up some cross pieces on a work bench.

set-up.jpg

By using shims I can get the three cross pieces aligned in a single plane. This helps as I need to now sand the top as flat as I can. Having the work piece rest on a flat plane helps a lot. And now I begin sanding the top. Table tops take a lot of sanding.

todd_sanding.jpg

I start with a belt sander.

To make sure that I am sanding the work piece flat I check it often with a pair of winding sticks.

p1010004.jpg

And then I go back to sanding. Eventually I get one face flat, then I turn it over and work on the other face. After an hour or so of using the belt sander I turn to a jig I developed some years ago to further flatten the work and to take out the machine marks left by the power belt sander.

p1010006.jpg

It’s good exercise!

When the top is flat and smoothed I lay the pattern back on it, trace the outline one more time and then cut it out with a jig saw.

p1010009.jpg

Sorry about the dust on the camera lens. Things are pretty dusty at this point.

The sawn edge is smoothed by using a sharp block plane.

block-plane.jpg

The edge is then rounded over with a router.

router.jpg

And the top is starting to look like a surfboard.

top1.jpg


Next in the series.

Ice storm today

Today we are being hit with an ice storm. The forecast is for up to 1/2″ of ice this afternoon. No way was I about to drive my old pick up truck into work this morning. I live on one side of the Milwaukee River and my shop is on the other side. You have to travel down into the river valley and then back up going in either direction and the roads can get pretty treacherous with an ice covering. Luckily I only live about 2-1/2 miles from my studio so when I need to I can walk. There have been times when I’ve cross country skied in. Today I chose to walk it.

As I walked. more like trudged in I was thinking about some of the images of my shop I posted yesterday. They sure make the shop look messy. I know that part of it has to do with the nature of photography, collapsing the foreground and background onto a single plane, and I didn’t monkey with adjusting the depth field on any of the shots. But, to be honest, my shop is pretty messy. When I look at some of the woodworking magazines I subscribe to I am always impressed with how clean and organized the shops they show in them look. Although, I must say, there is definitely a trend toward showing ever cleaner, ever more well organized shops in some of those magazines over the last 20 years.

I think that messes are very personal, neat and organized is very impersonal. Of course every one can be neat in their own way, but there are some obvious rules about neatness and organization that everyone must follow if they want a space to look organized and neat to others. As far as the magazines go it maybe that neat, organized shop spaces appeal to more people than more individualistic spaces. More appeal, more copies sold.

There is also the issue of safety. An organized, clean and neat shop is without doubt safer if there are several people working in that shop. Actually, there is an imperative to organization and neatness when working with several people in one shop. Each person will likely need to know where all the various shared tools are to be kept so that they can find them. When I’ve had apprentices and employees my shop has been much neater, if for no other reason than there are more people available to put things away and sweep up.

Yesterday, as I was working on the surfboard table base I reached for my cabinet scraper and it wasn’t in its little cubby hole where I keep it. I spent about 15 minutes searching for it. That is actually a pretty rare experience for me. My shop looks messy, but it is really very personalized and I can usually put my hands on any of the 100’s of tools in the 2,500 square feet of the shop within a minute or less. I really hated to loose that scraper. I’ve had it for at least 15 years. Eventually I grabbed another, even older one for the task but kept my mind exploring for that thing.

Pop, of course, I used it when I had gone out to help a friend with a finishing problem, and there it was packed away in my touch-up tool kit.

scraper1.jpg Here it is, in its plastic case. It is a small tool but immensely useful.

scraper2.jpg Part of the reason I hated loosing it so much is that I’ve worked that scraper so many times, both in sharpening and scraping wood. The sharpening process is particularly a matter of feel and interaction with your skin and hands. It’s almost like your hands have to know how to sharpen it more than your brain. You start by using a file to square the long edges with the faces as the scraper is held in a vice. You have to hold the file as square to the faces as you can, using your knuckles to brace and guide it, then you lean your whole body forward to push the file along the edge. You repeat this with a sharpening stone to remove the file marks.

At this point you should be able to run your finger across the face, over the edge and feel a smooth path. You then hold the scraper down on the bench with one hand and take a tool called a burr, a piece of very hard steel that is either a rod or a rounded in an oval and draw it down the edge of the scraper at just the right angle to push up the corner edge made between the scraper edge and face to create a very small curl of metal. This hook is very sharp and can make the finest shavings if scraped against a piece of wood.

There are other tools that I am quite connected to. Here are a couple of hand planes.

planes1.jpg
The larger plane is a jack plane that once was my dad’s. When he gave it to me I had to tune it up and have, over the years, slightly modified it to suit me. The smaller plane is a block plane which I have also tuned and modified. Both I keep within easy reach, sometimes just needing to take a few strokes to get the final dimension of a work piece just right. Sometimes I’ve spent an entire afternoon planing wood by hand with one of these.

One more tool for now, as I really need to get back into the shop. Something about a snowy day that seems to say everything is different today. Anyway, I made this mallet many years ago while working in the shop of a great freind of mine.

mallet.jpg

As a matter fact, the friend is Dan Cramer and you can see his link in my blog roll. He was teaching about the wood lathe and I made this as an exercise. Somehow I got it just right the first time and although I’ve made several other mallets over the years this one fits my hand the best. The little knob at the end of the handle keeps the mallet from slipping out of my grip without me having to hold it really tightly and it can be used to give a very gentle tap by reversing the mallet.

I was thinking about saying something about the various wood shapes I stash in my shop.

misc-wood.jpg

And the lathe in the northeast corner of the shop.

lathe.jpg

The lathe which I just recently used to complete a small turning project and haven’t yet cleaned up, but I really need to get back to work now. Maybe more on neatness later.

Surf Board Table III -ii

Part 2 in the making of the surf board coffee table.

pc050015.jpg

One more check of the pattern with the boards test clamped then I trace the pattern onto the boards to help me align them during glue up.

pc050018.jpg

I gather up my supplies- wood glue, shop made applicator, extra clamps, wax paper and a rag -and bring them to the glue up frame area of the shop. You can see the boards set on the glue up frame in preparation of a test clamp. Once you start spreading the glue you have to work fast to get the boards set up on the frame, aligned and clamped so it pays to have everything you may need at hand.

pc050022.jpg Here’s the glue up frame with the work pieces all clamped in the test clamp. This is the time to decide if you need more clamps, cross palls or other supplies.

pc050019.jpg The cross palls are, in this case 2 x 4s, clamped across the direction of the glue joints to hold the boards in alignment and in a single plane. They also keep the whole glue-up assembly from popping off the frame when I crank down on the bar clamps.

Now I take everything down and spread the wood glue on the edges to be glued.

pc050023.jpg Did I mention that you have to work fast to do this?

While the top is in the clamps as the glue sets I work on cutting out the legs. pc050003.jpg

Once the legs are cut out on the band saw they go to the drum sander to sand out the saw blade marks and get the legs to their final shape. pc050004.jpg

to be continued…. here